
MQTT protocol has been widely used in Internet of Things projects to connect End-Nodes to the Cloud. Here in this article, we will learn how to set up our personal MQTT broker on a Cloud Virtual Machine and protect it with Username-Password Authentication. This guide will be pretty basic and easy to follow along.
Install Mosquitto MQTT Broker
SSH to your cloud virtual machine and execute below 2 commands on terminal
sudo apt-get update
sudo apt-get install mosquitto
Just after installation the MQTT broker will start automatically and we can verify it with below commands (mosquitto-clients must be installed on client)
netstat -atn
mosquitto_pub -h 11.22.33.44 -t "topic-1" -m "howdy world" -d
mosquitto_sub -h 11.22.33.44 -t "#" -v
To Start/Stop/Restart use below commands
sudo systemctl start mosquitto
sudo systemctl stop mosquitto
sudo systemctl restart mosquitto
Configure Username and Password for MQTT Broker
The above setup will expose out MQTT broker to Public internet and trust me there are many hackers on the internet who have written programs to scan random IP for any open service. So in order to protect our broker we need to secure it.
Mosquitto comes with a password file generating utility called mosquitto_passwd.
sudo mosquitto_passwd -c /etc/mosquitto/passwd samarth
Password: password
After this we need to modify the mosquitto broker file and add the below lines and restart the broker.
sudo nano /etc/mosquitto/mosquitto.conf

// add below to lines and save
allow_anonymous false
password_file /etc/mosquitto/passwd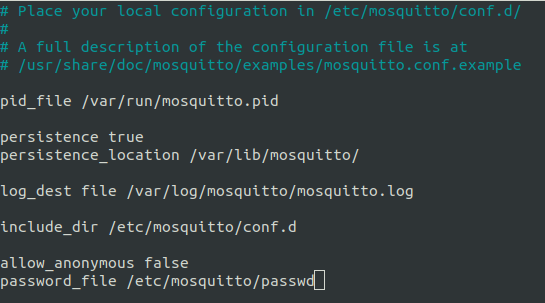
Now to connect to your broker and verify Pub/Sub use the below strings
mosquitto_pub -h 152.67.7.97 -u samarth -P "password" -t "topic-1" -m "howdy world" -d
mosquitto_sub -h 152.67.7.97 -u samarth -P "password" -t "#" -v
Now our MQTT broker is secured and only our trusted clients can connect to it.