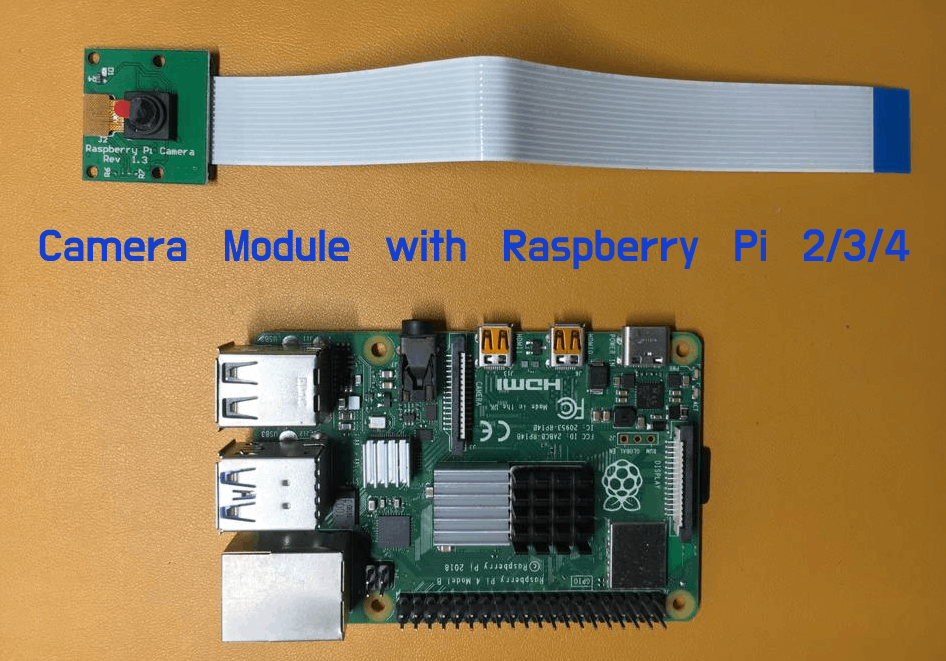
Using a Camera Module with Raspberry Pi can have a variety of use-cases ranging from highly complex AI and Computer Vision to simple use-case like setting up a CCTV system. In this step-by-step guide, we will learn how to set up a Raspberry Pi camera module and test it to take a still image to verify that our module is working as expected.
The camera module has a Camera sensor which is pretty much similar to the one we have in our smartphone. And it can be used to Take Picture and Record Videos.

Connecting Raspberry PI camera is the first Step
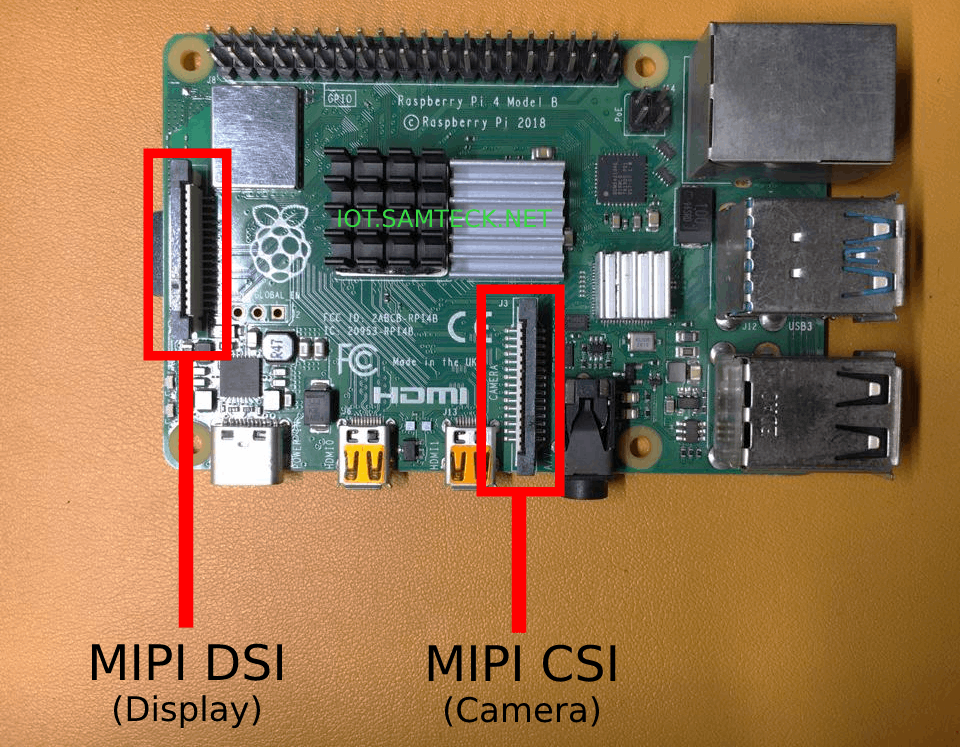
On your Raspberry Pi 2/3/4 there will be 2 MIPI (Mobile Industry Processor Interface) ports :
- MIPI DSI (Display Serial Interface)
- MIPI CSI (Camera Serial Interface)

Note: Make sure to switch off your Raspberry Pi if you are doing this for the first time.
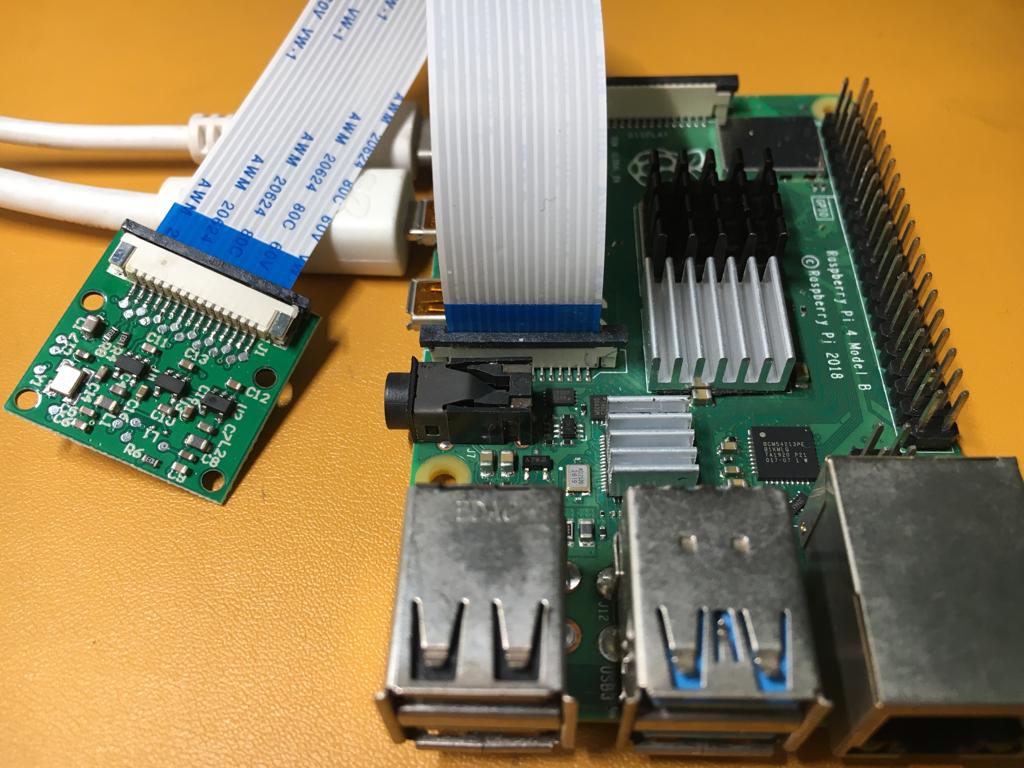
To connect the Camera Module we have to use the MIPI CSI interface (the port in the center near to the USB ports) as shown in the image.
- Now lift up the tab on the port a few milimeters
- Slide in the Camera cable (blue side of the camera connector is facing the USB ports)
- Push the tab back down to securly held the camera wire

Enable the Camera Interface from Raspberry Pi Configurations
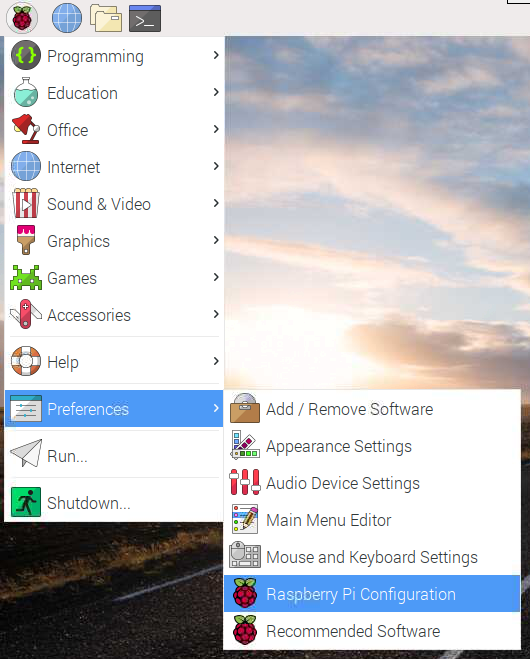
To use the camera module which we attached, we first need to enable it from the Raspberry Pi Configurations.
- Start your Raspberry Pi
- Open Raspberry Pi Configuration

- Enable Camera Interface

- Reboot your Pi
Testing your Camera Module By Taking Image and Recording Video
Now it’s time to test your camera module. We will be using raspistill and raspivid tools to take images and record videos respectively (these tools are installed by default into your Raspbian OS)
Open Terminal and run below command to take a picture and image will be saved on your Desktop
raspistill -o Desktop/image.jpgRun below command to record a video
raspivid -o Desktop/video.h264Below are some examples of variations of the above commands
// change resolution of the image
raspistill -o Desktop/image.jpg -w 640 -h 480

// horizontal and vertical flip
raspistill -hf -vf -o Desktop/image.jpg

// record video for 5 seconds
raspivid -o Desktop/video.h264 -t 5000

// record a video for 2 seconds with vertical flip and specified resolution
raspivid -o Desktop/video.h264 -w 1280 -h 720 -vf -t 2000
Troubleshooting
- Restart Your Pi
- Verify your Connection
- Try Using different RPi or Camera module (if possible)
