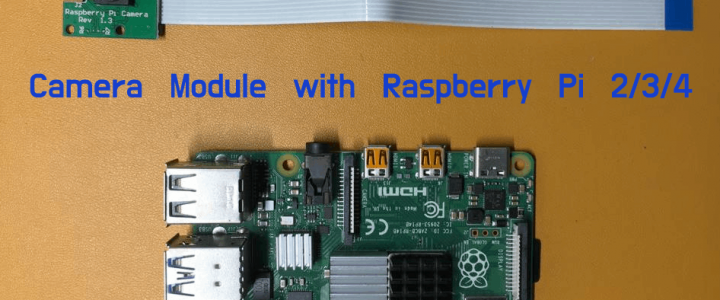
How to Interface and Test Camera Module with Raspberry Pi 2/3/4

camera-module-raspberry-pi

Using a Camera Module with Raspberry Pi can have a variety of use-cases ranging from highly complex AI and Computer Vision to simple use-case like setting up a CCTV system. In this step-by-step guide, we will learn how to set up a Raspberry Pi camera module and test it to take a still image to verify that our module is working as expected.

The camera module has a Camera sensor which is pretty much similar to the one we have in our smartphone. And it can be used to Take Picture and Record Videos.
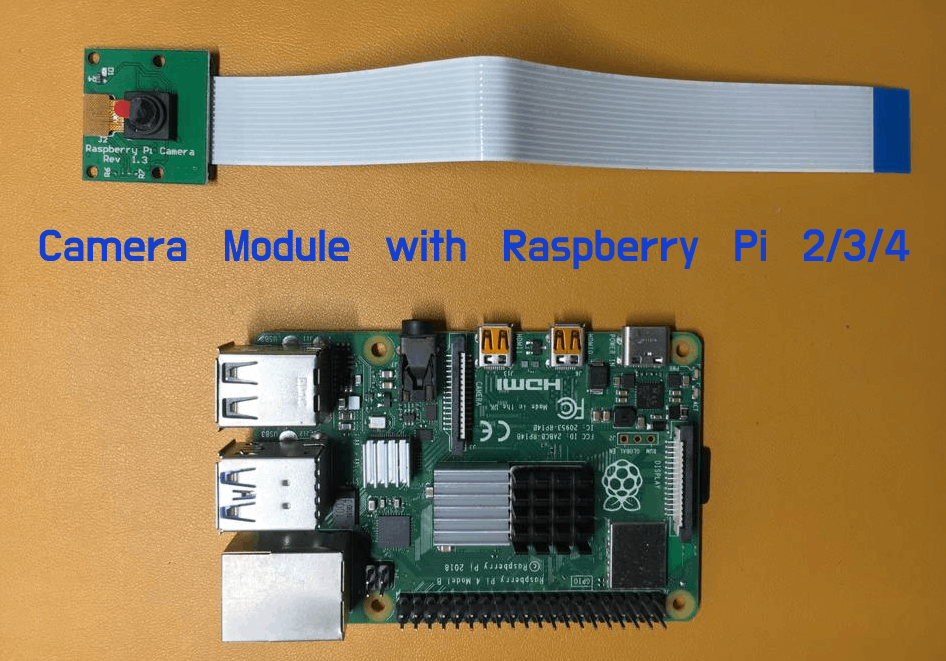
Connecting Raspberry PI camera is the first Step

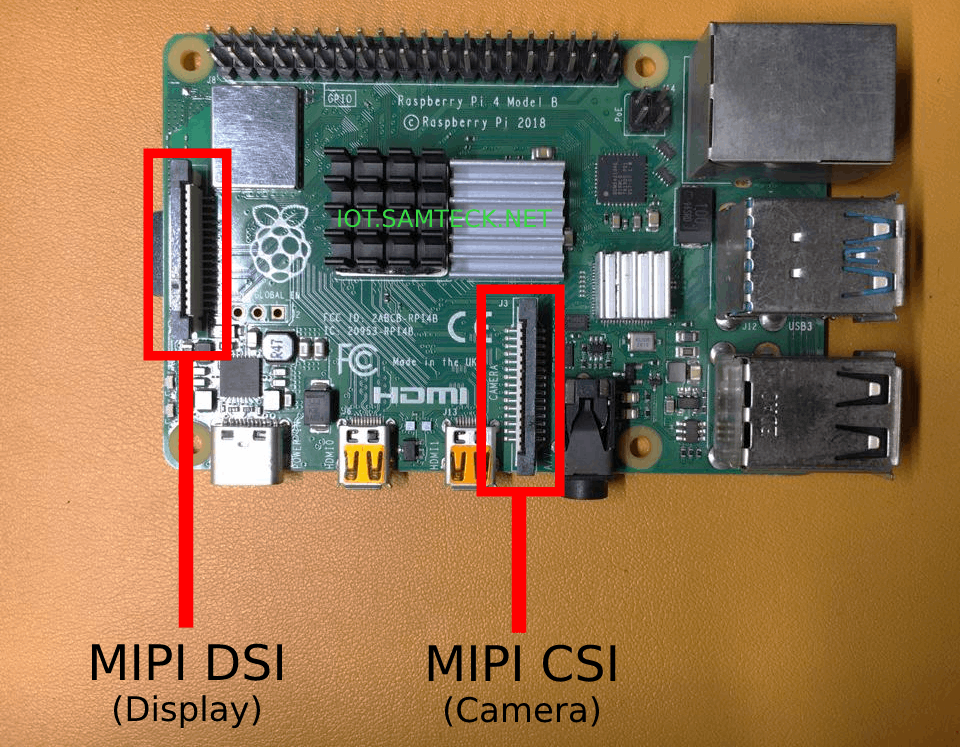
On your Raspberry Pi 2/3/4 there will be 2 MIPI (Mobile Industry Processor Interface) ports :

  • MIPI DSI (Display Serial Interface)
  • MIPI CSI (Camera Serial Interface)

Note: Make sure to switch off your Raspberry Pi if you are doing this for the first time.

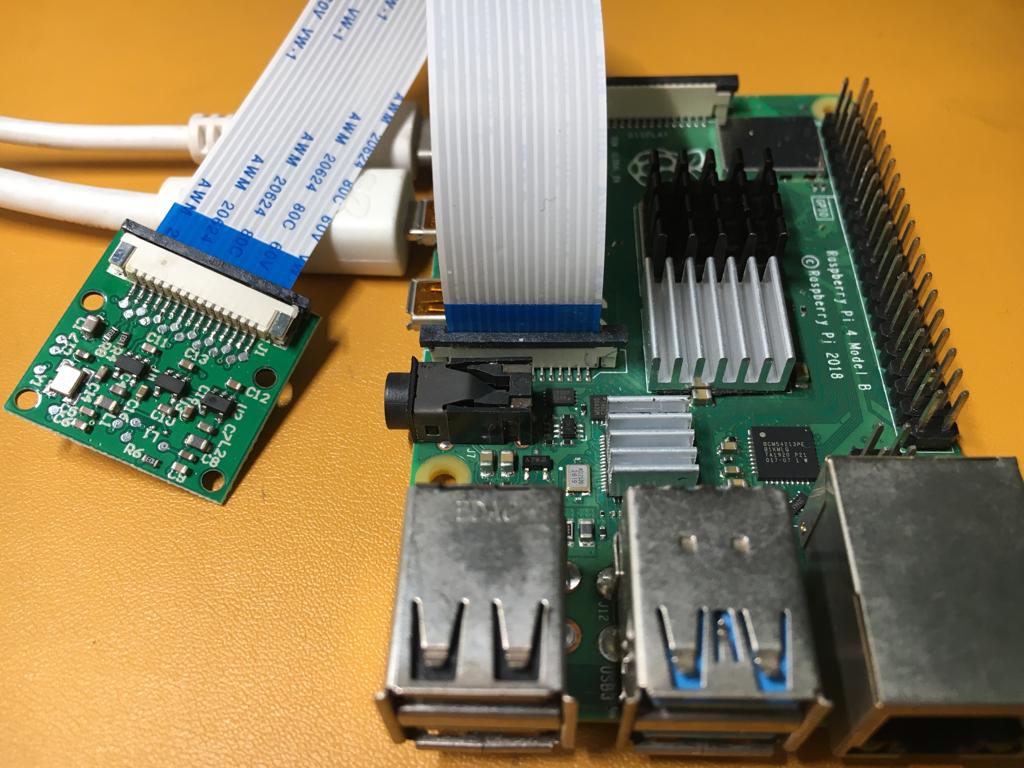
To connect the Camera Module we have to use the MIPI CSI interface (the port in the center near to the USB ports) as shown in the image.

  1. Now lift up the tab on the port a few milimeters
  2. Slide in the Camera cable (blue side of the camera connector is facing the USB ports)
  3. Push the tab back down to securly held the camera wire
Enable the Camera Interface from Raspberry Pi Configurations

To use the camera module which we attached, we first need to enable it from the Raspberry Pi Configurations.

  • Start your Raspberry Pi
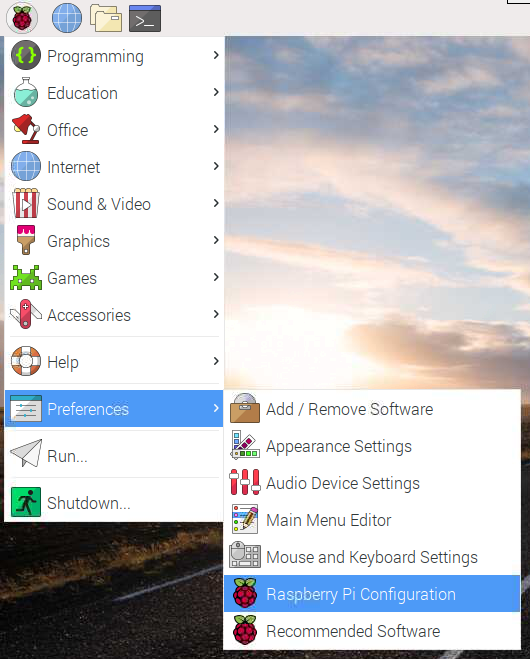
  • Open Raspberry Pi Configuration
  • Enable Camera Interface
  • Reboot your Pi

Testing your Camera Module By Taking Image and Recording Video

Now it’s time to test your camera module. We will be using raspistill and raspivid tools to take images and record videos respectively (these tools are installed by default into your Raspbian OS)

Open Terminal and run below command to take a picture and image will be saved on your Desktop

raspistill -o Desktop/image.jpg

Run below command to record a video

raspivid -o Desktop/video.h264

Below are some examples of variations of the above commands

// change resolution of the image
raspistill -o Desktop/image.jpg -w 640 -h 480

// horizontal and vertical flip
raspistill -hf -vf -o Desktop/image.jpg

// record video for 5 seconds
raspivid -o Desktop/video.h264 -t 5000

// record a video for 2 seconds with vertical flip and specified resolution
raspivid -o Desktop/video.h264 -w 1280 -h 720 -vf -t 2000

Troubleshooting

  • Restart Your Pi
  • Verify your Connection
  • Try Using different RPi or Camera module (if possible)

Configure Wifi on Raspberry Pi running Raspbian in Headless Mode via Terminal

rpi-wifi-config-raspbian

Well if you came to this article 1 thing is sure that you are running your Raspberry Pi in Headless Mode (with GUI) and you want to configure WiFi on your Pi. If by any chance you are using Ubuntu head on HERE. And if you are using Raspbian / Raspberry Pi OS (as they call it nowadays) you can read this article.

There are actually 2 ways to configure WiFi – “The Easy Way” and “The Technical Way”. If you are in hurry, then just follow the easy way at the end of this article and if you want to understand the internal working of an OS then you proceed with the Technical way.

configure-wifi-raspberry-pi-headless-terminal

The Techincal Way to Configure WiFi on Raspberry Pi OS

1. Editing wpa_supplicant.conf file:
sudo nano /etc/wpa_supplicant/wpa_supplicant.conf

2. Add WiFi access information to wpa_supplicant.conf file:
ctrl_interface=DIR=/var/run/wpa_supplicant GROUP=netdev
update_config=1
country=IN

# add wifi setup information here ...
network={
        ssid="SamTeck"
        psk="iot.samteck.net"
        key_mgmt=WPA-PSK
}

3. Restart Wifi Adaptor
sudo ifdown wlan0
sudo ifup wlan0

Confirmation Test:

sudo reboot
 
### wait, then without the wired ethernet connected ... 
ssh pi@wifi-ip-address

The Easy Way to Configure WiFi on Raspberry Pi OS

Well this one is pretty easy will require just 2 mins to connect to WiFi; yes I know 2 min is still lot compared to the GUI way of just selecting the SSID and entering the password; but doing it the command line way is lot more FUN!

Enter this command in your terminal and follow the steps.

sudo raspi-config

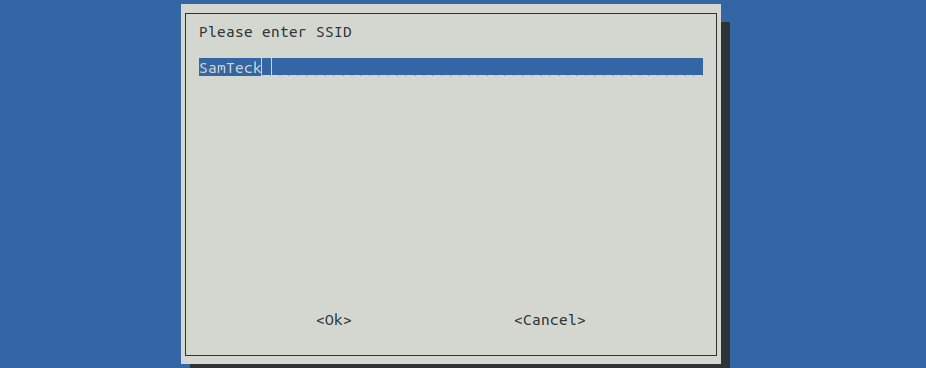
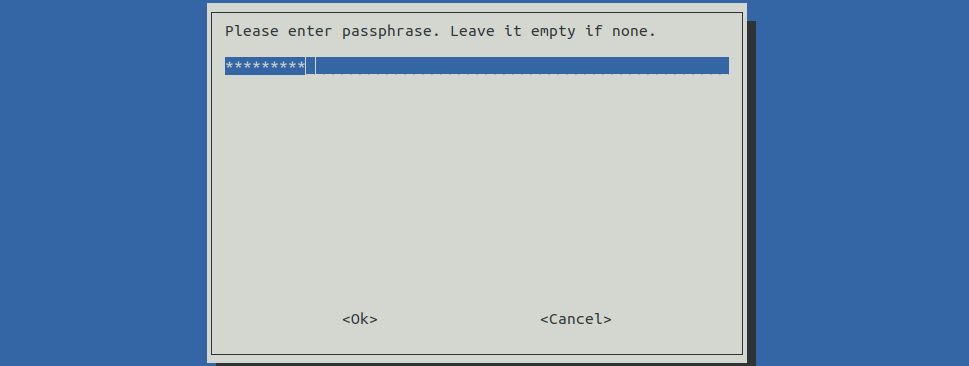
Now refer the screenshots below to enter your SSID and Password

Click OK and it will ask you to restart the Pi. After restart your Pi will be connected to the Wifi.

Configure WiFi on Raspberry Pi running Ubuntu in Headless Mode via Terminal

Configure WiFi on Raspberry Pi running Ubuntu in Headless Mode via Terminal

So, you flashed Ubuntu onto your SD card and booted Raspberry Pi for the first time, But realized that it’s not connected to the internet. Or maybe you just want to move from a wired Ethernet connection to WiFi. Well in this article we will discuss how to connect to WiFi using Ubuntu’s Netplan utility which is easy comparative to the wpa_supplicant utility which we used earlier..

Configure Wifi on Ubuntu Terminal Raspberry Pi

Follow the steps below to Configure Wifi on Ubuntu

1. Update system (Optional):
sudo apt update
sudo apt full-upgrade
sudo reboot

2. Determine interface names (copy wireless interface)
ip link show

# 1: lo: <LOOPBACK,UP,LOWER_UP> …
# 2: eth0: <BROADCAST,MULTICAST,UP,LOWER_UP> … state UP …
# 3: wlan0: <BROADCAST,MULTICAST> … state DOWN 

3. Determine your-cloud-init.yaml and open for editing (prefix 50 most of the times)
cd /etc/netplan/
ls -l
# -rw-r--r-- 1 root root 666 May 15 22:00 50-cloud-init.yaml
### note your *-cloud-init.yaml file name

### backup *-cloud-init.yaml file
cp 50-cloud-init.yaml 50-cloud-init.yaml.bak

### edit *-cloud-init.yaml
sudo nano 50-cloud-init.yaml

4. Add WiFi access information to *-cloud-init.yaml file
# This file is generated from information provided by
# the datasource.  Changes to it will not persist across an instance.
# To disable cloud-init's network configuration capabilities, write a file
# /etc/cloud/cloud.cfg.d/99-disable-network-config.cfg with the following:
# network: {config: disabled}
network:
    version: 2
    ethernets:
        eth0:
            optional: true
            dhcp4: true
    # add wifi setup information here ...
    wifis:
        wlan0:
            optional: true
            access-points:
                "SamTeck":
                    password: "iot.samteck.net"
            dhcp4: true

Test, generate and apply the changed your-cloud-init.yaml config:

  • Testing: sudo netplan --debug try (continue even if there are errors)
  • Generate: sudo netplan --debug generate (provides more details in case of issues with the previous command)
  • Apply: sudo netplan --debug apply (if no issues during the previous commands)

Confirmation Test:

sudo reboot

### wait, then without the wired ethernet connected ... 
ssh ubuntu@wifi-ip-address

This is way easier compared to the old wpa_supplicant method in which we need to install it separately and much more steps for configuration.

How to Install NOOBS on Raspberry Pi

raspberry pi usb ports image

To start with Raspberry Pi you need an OS (operating system) to run on it like all personal computers. On this OS you will run all you programs and applications.

Like on your laptop you can install various OS – like Windows, Ubuntu etc. Similarly on your Raspberry Pi you can install various operating system.

raspberry pi logo

Check the list of Operating System Available for Raspberry PI

NOOBS stands for New Out Of the Box Operating system. NOOBS is an easy operating system installer which contains Raspbian. It also provides a selection of alternative operating systems which are then downloaded from the internet and installed.

Steps to Install NOOBS on SD Card

Buy an SD card 

Card capacity should be 8GB or more, preferably class-10 or more

Download Noobs

Click HERE and download the version of noobs (if you are unsure choose the option with Offline and Network install and Download Zip)

Prepare The Sd Card

Format your sd card with the tool given HERE (choose either for windows or Mac)

Insert your SD card into the computer or laptop’s SD card reader and make a note of the drive letter allocated to it, e.g. G:/

You will need to set “FORMAT SIZE ADJUSTMENT” option to “ON” in the “Options” menu to ensure that the entire SD card volume is formatted, and not just a single partition. After that click Format

DRAG AND DROP NOOBS FILES

Once your SD card has been formatted, drag all the files in the extracted NOOBS folder and drop them onto the SD card drive.
The necessary files will then be transferred to your SD card.
When this process has finished, safely remove the SD card and insert it into your Raspberry Pi.

FIRST BOOT

Plug in your keyboard, mouse, and monitor cables.
Now plug the USB power cable into your Pi.
Your Raspberry Pi will boot, and a window will appear with a list of different operating systems(you will only get raspbian based on your download) that you can install. We recommend that you use Raspbian – tick the box next to Raspbian and click on Install.
Raspbian will then run through its installation process. Note that this can take a while.

Congratulations, Now you have successfully installed. After this the Rasoberry Pi will restart and load into its graphical interface.