Well if you came to this article 1 thing is sure that you are running your Raspberry Pi in Headless Mode (with GUI) and you want to configure WiFi on your Pi. If by any chance you are using Ubuntu head on HERE. And if you are using Raspbian / Raspberry Pi OS (as they call it nowadays) you can read this article.
There are actually 2 ways to configure WiFi – “The Easy Way” and “The Technical Way”. If you are in hurry, then just follow the easy way at the end of this article and if you want to understand the internal working of an OS then you proceed with the Technical way.

The Techincal Way to Configure WiFi on Raspberry Pi OS
1. Editing wpa_supplicant.conf file:
sudo nano /etc/wpa_supplicant/wpa_supplicant.conf
2. Add WiFi access information to wpa_supplicant.conf file:
ctrl_interface=DIR=/var/run/wpa_supplicant GROUP=netdev
update_config=1
country=IN

# add wifi setup information here ...
network={
        ssid="SamTeck"
        psk="iot.samteck.net"
        key_mgmt=WPA-PSK
}
3. Restart Wifi Adaptor
sudo ifdown wlan0
sudo ifup wlan0
Confirmation Test:
sudo reboot

### wait, then without the wired ethernet connected ...
ssh pi@wifi-ip-address
The Easy Way to Configure WiFi on Raspberry Pi OS
Well this one is pretty easy will require just 2 mins to connect to WiFi; yes I know 2 min is still lot compared to the GUI way of just selecting the SSID and entering the password; but doing it the command line way is lot more FUN!
Enter this command in your terminal and follow the steps.
sudo raspi-config
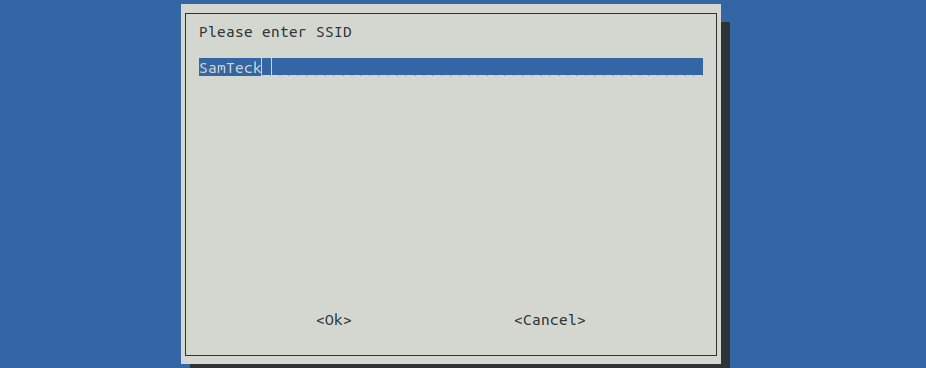
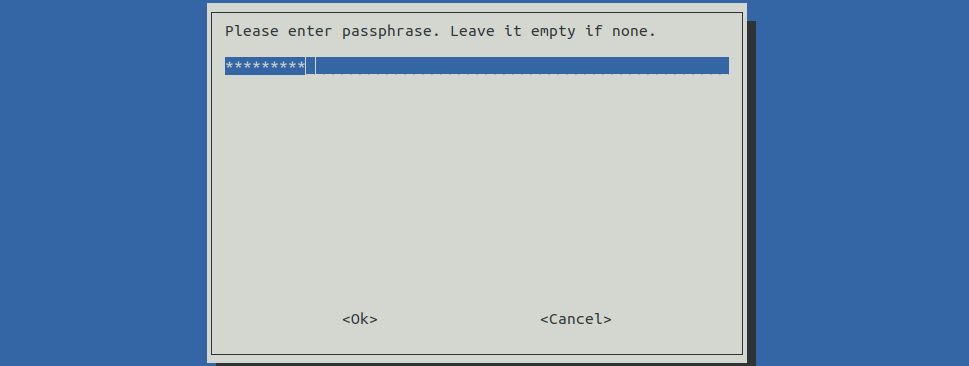
Now refer the screenshots below to enter your SSID and Password


Click OK and it will ask you to restart the Pi. After restart your Pi will be connected to the Wifi.
