These days IoT is becoming such a buzz word that many software professionals want to dive into the Embedded world. And the primitive board to start with embedded programming is ARDUINO. But the IDE which Arduino foundation provides us is basic and lacks essentials features for serious programming like Intellisense, GIT integration, code lay-outing, and necessary shortcuts.
One of the best IDE providers in the marketplace “VS Code” released an Arduino plugin to make life easier for serious programmers who want to work on Arduino. So here in this article, we will see how to install and configure VS Code for Arduino development.

Just follow the below steps and you will be up and running with a ‘Hello World’ example or Blink as they call it in Arduino world.
1. Install VS Code
Head on to https://code.visualstudio.com/download
2. Install Arduino IDE
Don’t get confused, official Arduino IDE contains some important libraries which will be used by VS Code.
Download Arduino IDE: https://www.arduino.cc/en/main/software
3. Install Arduino Extension for VS Code
Install Arduino extension for VS Code: https://marketplace.visualstudio.com/items?itemName=vsciot-vscode.vscode-arduino
This extension will also install C/C++ package as an add-on which is important for this setup.
After installing these IDE and Packages close them. Connect the Arduino board and re-launch VS Code.
4. Open Blink Example for Arduino
Not all VS Code’s functionality is accessible via menus. Instead, VS Code has a command-line-type facility for interfacing with extensions called the Command Palette.
To run the Command Palette, type “Cntrl+Shift+p” to display a drop-down box that you can enter commands in. Type “Arduino Examples” into the command palette and press return. This will open up a link to the familiar example projects – navigate to “01.Basics” and then double click on “Blink” to open the world-famous Blink project.
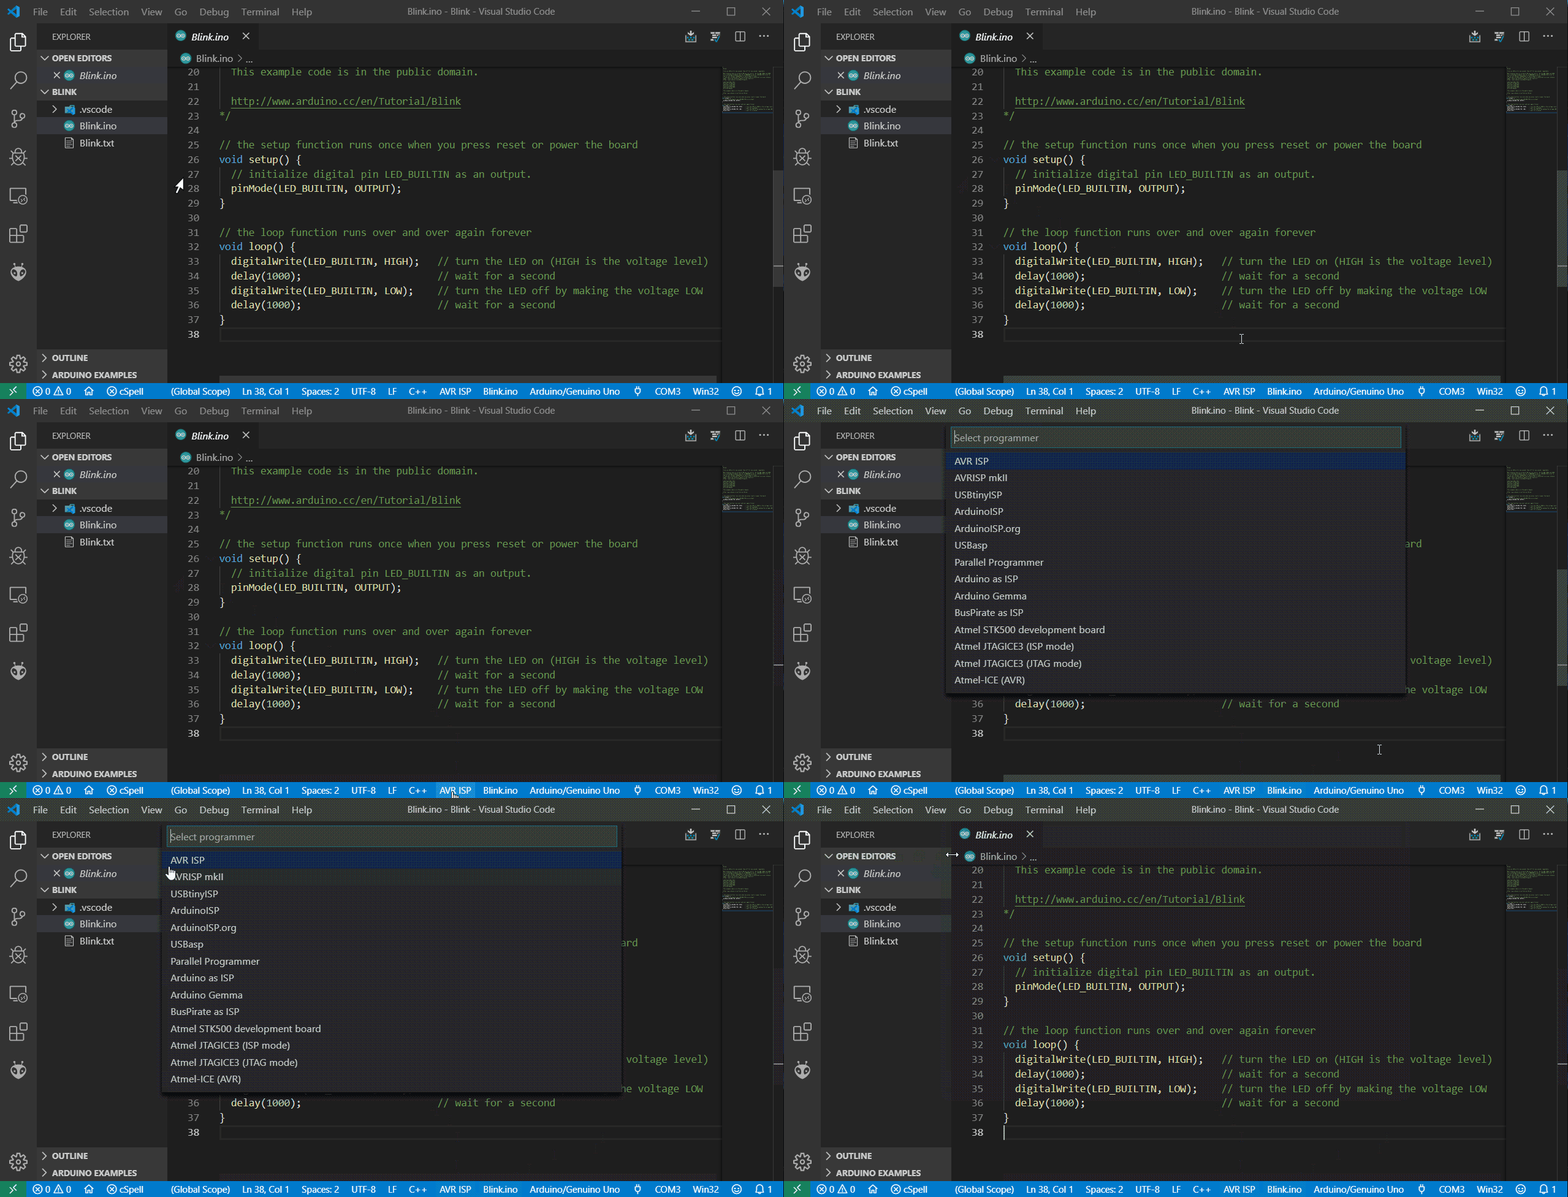
Once you have opened up an Arduino .ino file, VS Code reconfigures in an Arduino mode, and gives access to special functionality in its bottom blue margin, as shown in the image below.

Click on <Select Programmer> and select AVR ISP (Arduino AVR Board)
Click on <Select Board Type> and select Arduino/Genuino Uno
Click on <COM> and select your Arduino serial port
At the top right of the window, you will see icons for Verify and Upload the code. All other features from Arduino IDE can be searched on Command Pallet
5. Taking Advantage of VS Code functionalities
- Intellisense and Error Checking: IntelliSense is a code completion engine that looks through all of the source code in your project — including external libraries — and then suggests functions and variables as you type your code. Also, VS Code constantly checks your code as you write. If it detects an error, it underlines it with a red squiggle and offers advice.
- Use a src folder to hold your code folders: Layout your project properly using a folder structure as below:-
ArduinoRootFolder
— src
——- FolderA
——- FolderB
————-SubfolderA
- Add an ‘output’ option to arduino.json: By default, you will have an arduino.json file in your project under .vscode folder which contains build information for your project. Just add the below line to build your project in the current folder itself
,”output”: “build”
- Gitify Your project: One powerful thing which you can do VS Code is using GIT and checking in your code without any delay. Just click the Git icon at the extreme left of the window.
That’s all you need to set up your Arduino project in a professional way. Below are some links which you can refer to if you want a more elaborative explanation.
